Saturday, February 23, 2013

Sparkly Bear Toy

I was invited to a little girl's one-year birthday party.
Her room is all purple dandelions, so initially I chose a lavender fabric with a stars pattern, but it just seemed lacking.
So I laid it out on some sparkly flannel, with purple minky for the ears and tummy.
I liked the darker fabric better.
This is a pattern from the book One Yard Wonders, by Patricia Hoskins and Rebecca Yaker.

I used fabric for the eyes and nose, and embroidered the mouth.
I thought that was a safer choice for such a young girl.
The neck ribbon is also sparkly!
She liked it!


Labels: ,

Friday, April 23, 2010

Ashlyn's Dress: Continued

Yesterday I mentioned that I had to cover up a hole in the front of the bloomers made by my wandering seam ripper.
Applique wasn't going to work (too close to the center seam), and a ribbon wasn't going to work (too centered), and a ruffle wasn't going to be in the right place either.
I considered making three-dimensional flowers from the bloomers fabric, but chances are they wouldn't look nice without ironing, and that's a hassle.

So I bought some pink embroidery floss and the plan was to make random French knots.
I figured the knots would cover the one tiny hole, while echoing the polka dots in the fairies print.
I considered metallic silver, but figured the regular cotton would be easier to use.
Unfortunately, the tiny hole was larger than I realized.
Hmmm....now what?

I took yet another print by Michael Miller, Apple Morning Fairies--the same fairies as the skirt fabric, but larger, with green leaves and blossomsI randomly cut out leaves and blossoms, fused them with Steam a Seam all around the bloomers in line with the little hole, then used the tiniest stitch on my machine to stitch each applique.

Ridiculously time consuming, but I think it's cute.
The leaves bring green into the bloomers, and tie the entire design together.
You'll see.

Tomorrow: the finished dress.

Labels: , , ,

Ashlyn's Dress: Part One

Remember when I made blocks for Ashlyn's baby shower?
Well, now she's turning a year old, so I thought I'd sew a little dress.
Rather than sort through pattern books or even vintage patterns, I decided to use a pattern I already had--the jumper with bloomers pattern in Amy Butler's book, "Little Stitches for Little Ones".
I went to Beverly's Fabrics (much better quality than Joann's) looking for Amy Butler fabric (mom Amber loves her fabrics), but their selection of AB isn't what it used to be.
I had a hard time deciding, but ended up choosing Michael Miller's Rose Morning Dots--a print with fairies, pinkish-colored polka dots, and a dash of glitter.
I paired it with a coordinating stripe, in the Marabella line by Amy Hamberlin of Kati Cupcake Designs for Henry Glass Fabrics (holy cow, that's a mouthful!)
and I added a third print in the same colorway, also by Michael Miller (well, more accurately it's Sandi Henderson for Michael Miller, called Meadowsweet), called Vintage Paisley (in Blush).
It's such a strange shade of pink, I was excited to get a match.
Mom Amber loves lime green and hot pink, and this is more of an apple green with a coral, but I think she'll like it anyway.

I was going to sew French Seams, using this tutorial, but then I realized the Amy Butler pattern is lined, so it would automatically be finished inside.
I'll save the tute for another project.

I have been sewing on the outfit for several hours today, but had some problems.
I put the bloomers together, and was measuring to put the casing in the waistband, but things just didn't look right.
Oops, it was upside down.
Hello seam ripper.
Unfortunately, I had used the tiniest straight stitch and zigzag on my machine, so starting over took some time.
Aarrggh.
Even worse, the seam ripper skipped and made a hole right in the front.
I'll post my solution tomorrow....

Labels: , ,

Saturday, March 27, 2010

No Peeking, Jackie!

I've been intending to complete this project for quite awhile now.
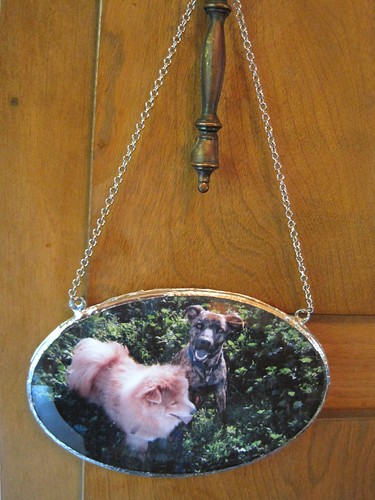
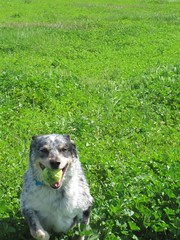
I had taken some super cute photos of doggies Dylan and Reese a year ago (surprisingly good quality from a disposable camera!).
I set the pics aside and didn't show the owners, knowing these were so special that I knew I needed to make something.
I did blog one, hoping the owners didn't see it.

At first I was thinking I'd place the photos back-to-back under glass and make a Christmas ornament.
But that would have meant reducing the size of the images, and I really wanted the full impact of a 4" x 6".

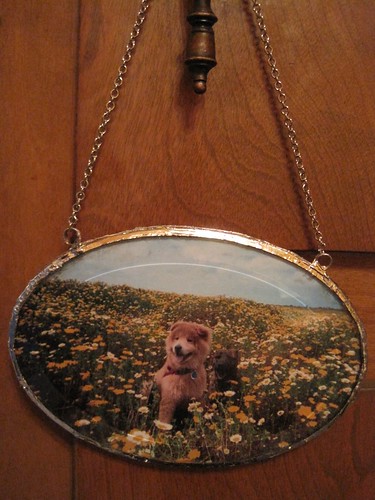
So I thought, well, I can still place them under glass, but I'll make two, with a dog-themed quotation on the reverse.
The finished product can hang on a wall or whatever.
I found some amazing beveled glass at Alpine Glass (a stained glass store in San Diego).
Soldering stuff at the ready

I envisioned these hanging by a chain, so an employee at Alpine glass showed me how to twist copper wire around a pencil to make the loops for hanging.


Christmas came and went, but I still wanted to finish this.
Jackie (their "mom") just had a birthday this week, so I pushed myself to work on the project.
Ta Da!
Soldered Ornament
Another Soldered Ornament

One of the reasons it took me so long to get around to putting these together was that I got hung up on what paper to use on the reverse--what paper should the quote be on?
Certainly not something plain...but what?
Should I collage the reverse in dog-themed images?
Nah...too busy.

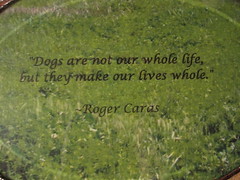
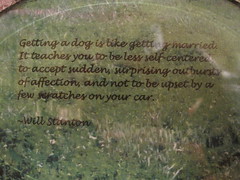
And it finally dawned on me what to use for the reverse--the greenery from Fiesta Island (the same location as the other photographs).

So I took a photo I had of Leroy, and I cropped out the green.
Leroy

That way the reverse is in the same color family, and I think it works
(a bit of glare from the night shot...lights hitting the glass)
Reverse side of soldered ornament
Dog Quote on soldered ornament

But let's be real, shall we?
These are far from perfect, but the more I messed with it, the gloopier it got.
Ugh!
But then that tends to be my style, if you followed my making of the butterfly charms at all.

At one point, I peeled off the copper tape that I had already soldered, and started again.
Aarrgghhh.

Then my iron got too hot, and repeatedly going over an area left it burned (oops!)
I have one iron that doesn't get hot enough, and another that gets too hot.
I need a really decent stained glass-quality soldering iron
So I mended it.


Finally, at some point, I just had to step away and call it okay.
As Sally Jean Alexander would say, "Love and embrace"
(I will be blogging about my class with her soon, by the way).

I'm pretty sure Jackie is going to love these though.
Between those cute faces and that gorgeous glass--they'll make her smile.

Labels: , ,

Thursday, March 19, 2009

Soft Fabric Baby Blocks

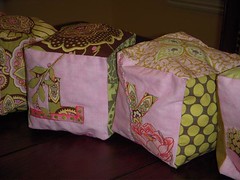
I was invited to a baby shower of one of my co-workers, and decided to make her fabric baby blocks.
I already knew that mom-to-be Amber likes Amy Butler fabrics (I made the ring bearer pillow for her wedding from Amy Butler's mod pillow pattern, and we've discussed AB fabric designs before), I knew she is going to be having a girl and naming her Ashlyn, and I knew the baby's room is lime green and pink paisley.

So first off I bought an Amy Butler Lotus fabric: Star Paisley in lime

And Amy Butler Daisy Chain Flowers, and Jasmine
plus I already had some pink and green fabrics left over from my entry for the Amy Butler purse challenge.

I found this tutorial online by Motherhood for Dummies with this cute idea to make puzzle blocks
and this tutorial on Whipstitch with more info

but the most informative how-to was the tutorial on Flickr by London Mummy
Though I didn't use the idea this time, one of the comments suggested to stuff the cubes with strips of plastic grocery bags (the crinkling sound is fun), and to use a cat toy instead of a jingle bell inside, if you want the cube to rattle (less choking hazard).

All the tutorials claimed this was a really easy project, but it took me FOREVER to make these.
I used a magnifying lamp to handstitch the last opening closed, using tiny stitches that are barely visible.
The hand stitching took me over four hours alone.

I decided not to make these rattle, so did not include a bell inside.
I also decided, rather than puzzle blocks, that I'd do alphabet blocks, and I'd spell out her name.
That meant I needed to make six cubes, so I cut out 36 five-inch squares in several fabrics (I used 13 different fabrics).
fabric blocks
Oops, didn't spell it correctly here!
(sorry the image is so small. Click on any image to enlarge)

I made sure the placement of the fabrics was unique, with especially nice prints on each end of the first and last block, as well as on the top side of all six.
Initially I wanted to make at least two quilt blocks, but I just didn't have the time.
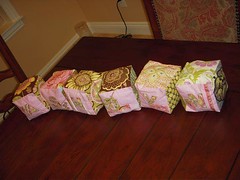
Top of Blocks

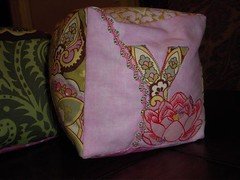
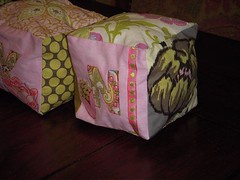
I chose each background on the alphabet side as pale pink, with the letter fabric the green paisley print.
I couldn't find any cute letter designs in coloring books or quilt books, so I had to settle for a standard two-inch stencil that I found at Michael's.

I fused each (fussy cut) letter in place, then used a small zigzag (from my new machine!) to adhere it in place.
I chose a variegated thread that appeared pink and green, but when I used it I discovered it's actually orange, blue, green, and purple.
I actually still really liked it, so I used it throughout.
Go figure!
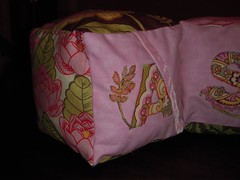
block detail

I added three trims to the alphabet side--a velvet ribbon, a polka dotted ribbon, and a pink and green rick rack.
That seemed too plain, so I embellished each letter with fabric floral motifs that I fused, then stitched.
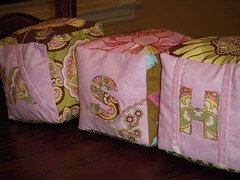
Blocks close up

L and Y blocks
Y block
N block

I think they turned out really cute!
Unfortunately, I lost my invitation so therefore didn't have the address of the shower, so didn't attend :(.
I'll give these to her later.

Labels: , ,

Wednesday, December 31, 2008

Some fun gifts I gave this year

Snacktime, a children's book and a CD of songs, by the Barenaked Ladies.
(link includes song previews. You Tube has related videos too)

David and Goliath pajama/lounge pants, this one perfect for my friend who is the only girl in the house with three boys (her husband and two sons)

I bought AMAZING stained glass frames for photobooth strips from Whispering Willow.
She was nice enough to do custom orders for me, so I was able to choose charms specifically personalized for three friends.
Deborah's work is absolutely beautiful.

I got my mom vintage perfume, Blue Carnation by Roger & Gallet.
This hasn't been made since the 60's or so, but the gift set I purchased on ebay still smells heavenly.
The set includes cologne, sachet powder, and soap, and was new in the package...an opened gift found by the seller at an estate sale.
Set me back a pretty penny, but my mom was pleased.
This perfume seems to have almost a cult following--I tried for months before I finally managed to win an auction.
It's a spicy scent, almost like cloves.

Labels: , ,

Thursday, August 14, 2008

Under the Sea

A little girl I know is having a birthday next month, and she loves all things Ariel (The Little Mermaid).
I was going to post this later, since her mom reads this blog and I like keeping surprises secret...
but I couldn't wait.

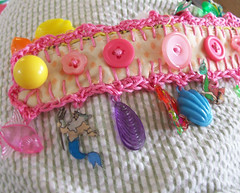
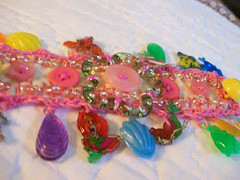
I have been a fan of Vallen's charm bracelets for quite awhile, and finally decided to order one.
This is the first time Vallen has ever attempted shrink plastic charms!
This is what she came up with
Mermaid bracelet
(click on image to enlarge)

I know this little girl, and she loves pink, and sparkles.
So I asked Vallen if she could add a bit more twinkle, and now the bracelet looks like this
Little Mermaid cuff bracelet

Isn't it cute?!
I just know she's going to love it!
Vallen's blog, Queenly Things, here.
Her Etsy shop.

Thanks Vallen!

Labels: ,