Monday, May 09, 2011

Tiered Plate Stand

The February/March issue of Readymade Magazine featured a tiered plate stand, made with sundae cups, candle sticks, and epoxy glue.
I had to give it a try.

I found these amazing Walter Kimble hen plates at a thrift store, and decided to use the similar designs together even though the options are open for mixing designs and sizes.


There are some examples of tiered plates on Etsy that use a large plate on the bottom and transition up to a tea cup on the top.
Perfect for chips and dip, cupcakes...you name it.

Here are just some of the glass items I picked up at the thrift store for possible pillars.


Here's the final result!


I used a candlestick as a pedestal too!(versus having the bottom plate just sit on the counter. A candlestick and one plate makes a cute cake stand)


I am much more apt to use a tiered stand versus a singular plate, and it really dresses the plate up too.
What a great way to showcase sentimental china patterns, or varying designs of a favorite company.

I have a stone egg I may place in an egg cup on the top as a finial, but I need to find the perfect egg cup first.

My first blog post via phone--not too shabby.

Labels: , ,

Monday, April 25, 2011

Michelle's Candle Tray

Yet another old project dusted off and finished.

I posted about the candle tray I mosaic-ed for my friend Michelle way back in 2005.
I had the same problem as I described before, with the glue not holding up.

I took a metal tray that I purchased at a thrift store, mosaic-ed using Coca-Cola themed broken plates, and embellished with bottlecaps, marbles, and mini bottles.

So I finally re-glued some of the mini Coke bottles and marbles.
You can't even see the pic I posted earlier, so these are much better.
Michelle, obviously, is a collector of Coca-Cola memorabilia.


Labels: ,

Monday, April 18, 2011

Jen's Mosaic-ed Plant Pot. Finally.

I'm determined to finish some old projects this year.
I started a mosaic on a plant pot for my friend Jen way back in 2005.
Oh my gosh, I finally finished it!

Way back then, I had started out using a couple different construction grades of PL glue that are used with a caulking gun, but they were too heavy duty and too messy.
Also too hard to remove if I had any excess.

I switched over to Liquid Nails for Small Projects to hold all the extra decorative trinkets.
When I grouted, however, the grout just knocked all the trinkets off.
Aarrggghhh!
I did some research on glue, and reviews suggested Weldbond.
Unfortunately, I had the same problem--the decorative items just wouldn't stick.
So frustrating!
I got so annoyed that I just wrapped up the projects and stashed them away.

Finally, I think I've solved the problem.
E6000 seems to actually hold, and it dries clear.
I'm crossing my fingers it lasts.
So far so good.

This pot started out when Jen bought a condiment tray in Mexico, and broke it even before she got it home.
I asked her if I could have the pieces, and I made her this pot as a surprise for her birthday (that I um, stashed away until now).
I used garden imagery throughout.

I also used other broken plates, broken pottery, and I embellished with pebbles, rocks, tumbled stones, marbles, half-marbles, jewelry, metal pins, coins, and buttons.
See the coin on the right? (click on the photos to enlarge)
There are three butterflies--two pins, and one that had been part of a plant pot.

I love the caterpillar on the mug handle, and the frog face.
There are three ladybugs.
I enjoy working in layers, and I love the three dimensional quality, versus just thinking in terms of pieces being flat.


Jen loves frogs, so there are three different frogs on this pot--this gold brooch, the green face that was a pitcher, and a small ceramic one that had been on a vase.
The dragonfly is a large button.
Note some of the additional broken plates include more sunflowers.
I think the large leaves may have been part of Jen's original item.
I added another mug handle, this time a solid blue, both to counter-balance the one on the opposite side, and to add fun to the design.

The little caterpillar figurine is by Hagen Renaker, and is one of my favorite embellishments on the pot.
There are three watering cans (or parts of) on the piece--the silver one was a pin, the small white spout below was a figurine, and the large blue spout was on a vase.
Note the ceramic rose, and there's the froggie.
See the ceramic stem with thorns? What an awesome find that was! (that was thrifted, but I did purchase some embellishments on ebay. Most of the other plates used I already had in my stash).
The small silver sunflowers are buttons
The large silver sunflower is a brooch.
The little gray bird is from a larger figurine, if I remember correctly. This is one of three birds on the piece.
The three dimensional piece is part of one of the condiment trays of the original piece Jen purchased--a blue-glazed pottery with a sunflower design, it featured of six (or was it four?) trays that grouped together side by side to form a circle.

Labels: ,

Friday, December 10, 2010

Time Frame

I made this frame several years ago, but I just pulled it out of storage.

Collaged around the frame are little mementos and trinkets from childhood.
The memorabilia surround a photo of me as a child, playing with my Mickey Mouse puppet, toy telephone and kaleidoscope.

I think this is such a fun time capsule, and it's a great way to showcase little toys and items that might just be collecting dust in a drawer (or worse, thrown away).
I mean, this would be a fun way to celebrate every year of a child's life--from McDonald's Happy Meal toys, to ticket stubs, to photobooth strips, to party favors.
It's a great way to use broken toy parts, game pieces, doll parts, beads, buttons, rocks, coins, and little pieces of jewelry.
You could incorporate stickers, bottle caps, labels, stamps, or whatever else might be of significance throughout the year.
This might make gifts for Grandma, or Mother's/Father's Day.
Really, it just gets better with time.

It's best to use a frame with a flat surface, and to use a glue that dries clear (inexpensive frames from Ikea are perfect for this).
Grouting is not necessary--just pile up all the trinkets and overlap at places.
You can hang some items off the edge for effect (like these diary keys).

On my frame, there are game pieces from a vintage Monopoly game (the thimble, race car, and canon), a Goofy-shaped eraser, disco ring, miscellaneous jewelry (including parts of old charm bracelets), and plastic cat off a wine bottle
More jewelry (mostly pins), and Blue Chip Stamps!
Barbie rollerskate, Smokey button, Susan B. Anthony dollar, jack toy, Scottie and shoe Monopoly pieces, shell from clam that used to be in my acquarium

Pin from Nixon's campaign for President, wing pins that the airlines used to give to kids, and a Weiner Whistle!

This project is similar to the Memory Jugs I posted about previously (in fact I mentioned this frame in that post).

This is also a great project for adults--you could make themed gifts.
For example, a wedding gift with trinkets that symbolize the couple's years together.
Or a vintage design with cat eye glasses, kitschy figurines, etc.
Maybe a Christmas frame.
You can commemorate a vacation (shells, sea glass, sand, matchbook covers)

You could make a large scale collage around a mirror with larger items like a doll head, parts of mugs or teacups, and larger collectibles (or parts of).
There are tons of possibilities.

Other collage materials to consider: (similar to items you would use on an art collage, but try to aim for date specific items...think in terms of capturing a moment)
wine cork
crayon
keys (especially skeleton keys)
chess pieces
collectible spoons
concert tickets
dice, marbles
tarot or loteria cards
fair ribbons, parts of trophies
rhinestones, faux jewels
doll arms or head
broken pieces of plates, tiles, teacup handle
toy parts (steering wheel, tire, gears)
foreign coins
scrabble tiles
old typewriter or computer keys
swizzle sticks
"I Voted" sticker
part of Halloween costume (eyepatch, earring, etc)

Labels: ,

Friday, May 28, 2010

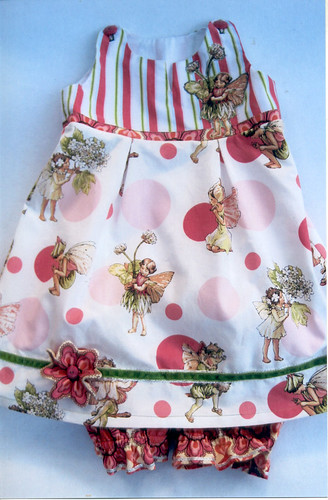
Voila--Ashlyn's Dress!

I'm finally showing the finished dress that I mentioned earlier.
I talked about fabric choice here.
And solving a problem here.
I used four fabrics, and Amy Butler's pattern for a jumper and bloomers in her book "Little Stitches for Little Ones".
Amy Butler jumper with bloomers pattern

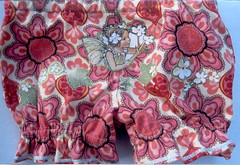
Let's talk about the bloomers first.
I had mentioned already that I added some appliques, but I wasn't happy with the way one of the flowers didn't match on the front seam (not that I had tried to match them exactly, but I actually did think about alignment of the pattern across the front).
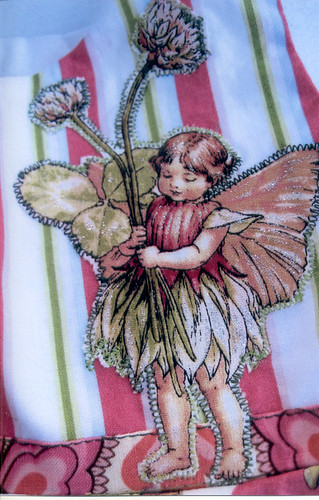
So I added a fairy face to the front, which not only solved my problem, it made the bloomers a lot cuter too.
(click on images to enlarge)
Bloomers
The photo doesn't show how glittery the fabric actually is.
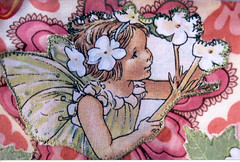
I used variegated thread in green tones to stitch her to the front
Fairy applique on bloomers
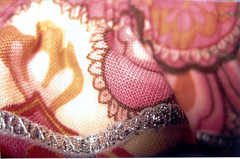
I added thin silver ribbon to the hem, using a zigzag stitch to couch the ribbon in silver thread
Tiny silver ribbon couched with silver thread

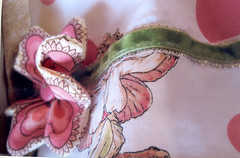
The hem of the dress got two more rows of silver ribbon, overlaid by a green velvet ribbon
Ribbons embellishment

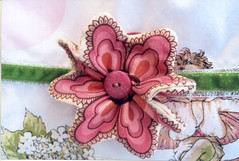
The ribbon was just shy of being long enough to meet, so rather than trash it and buy new yardage, I added a flower that I made from the bloomers fabric (two flowers were cut out, one was interfaced, sewn right sides together then turned, hand basted to give volume).
Flower embellishment
This was another example of a problem having actually been a positive, in that the end result is better than the original idea.
The button in the center of the flower is the same as the buttons used on the shoulder, only in a smaller size.

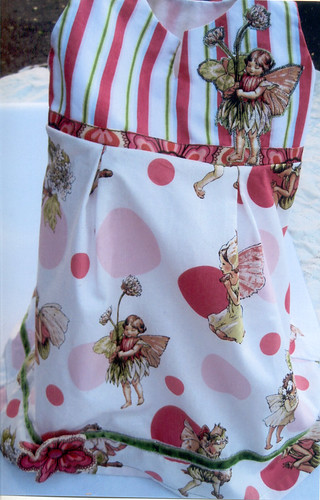
I added another fairy applique to the bodice, and used the bloomers fabric on the band to tie it all together (the pattern calls for the band and bodice to be the same fabric)
Fairy applique on bodice

Fairy Dress
I'm told this fits her perfectly, so that's pretty exciting.
I wish I had thought to enter it in the San Diego County Fair, but I didn't research the option until the deadline had ended.

Labels: , ,

Monday, May 24, 2010

Recycled bags mat

Knitting Plastic Bags
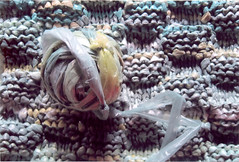
One of the projects I'm currently working on is knit in the same stitch as the scarf I just posted about, except this is on #10 needles, and the yarn (or "plarn") I made from 1-1/2" strips cut from plastic bags that newspapers come in.
I like this plastic because it's thin and pliable, and the clear bags (when used as yarn) read white, while other bags become a metallic silver.
I'm working this in two halves that I'll stitch together.
The one pictured is in green tones (plus a few yellow and white).
Another one is in blue tones (plus some grays/silvers).
My plan is for this to be a welcome mat.
I'm almost finished with it, but I'm waiting for more green and more blue bags.
Basically right now I'm out of yarn!

Labels: , ,

Saturday, May 22, 2010

Second Knitting Project Finished!

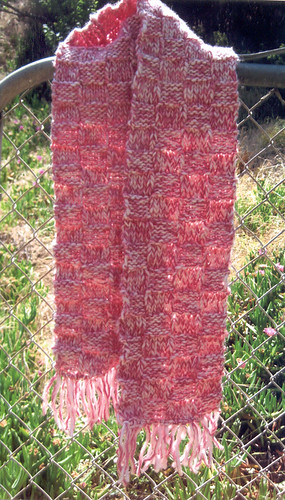
Yay, I made another scarf.
This pattern is called "The Magic Scarf" in Crazy Aunt Purl's book Drunk, Divorced, and Covered in Cat Hair.

Knitted Scarf
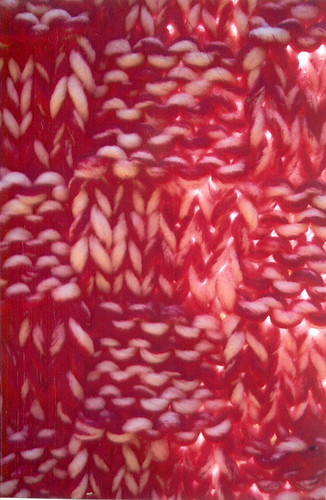
I used #11 wooden needles, and Filati FF Funky yarn, color #46, a wool/acrylic made in Italy.

Here's detail of the stitch.
It looks complicated, but it's just a knit 5, purl 5.
Knitting Detail

Labels: , ,

Friday, April 23, 2010

Ashlyn's Dress: Part One

Remember when I made blocks for Ashlyn's baby shower?
Well, now she's turning a year old, so I thought I'd sew a little dress.
Rather than sort through pattern books or even vintage patterns, I decided to use a pattern I already had--the jumper with bloomers pattern in Amy Butler's book, "Little Stitches for Little Ones".
I went to Beverly's Fabrics (much better quality than Joann's) looking for Amy Butler fabric (mom Amber loves her fabrics), but their selection of AB isn't what it used to be.
I had a hard time deciding, but ended up choosing Michael Miller's Rose Morning Dots--a print with fairies, pinkish-colored polka dots, and a dash of glitter.
I paired it with a coordinating stripe, in the Marabella line by Amy Hamberlin of Kati Cupcake Designs for Henry Glass Fabrics (holy cow, that's a mouthful!)
and I added a third print in the same colorway, also by Michael Miller (well, more accurately it's Sandi Henderson for Michael Miller, called Meadowsweet), called Vintage Paisley (in Blush).
It's such a strange shade of pink, I was excited to get a match.
Mom Amber loves lime green and hot pink, and this is more of an apple green with a coral, but I think she'll like it anyway.

I was going to sew French Seams, using this tutorial, but then I realized the Amy Butler pattern is lined, so it would automatically be finished inside.
I'll save the tute for another project.

I have been sewing on the outfit for several hours today, but had some problems.
I put the bloomers together, and was measuring to put the casing in the waistband, but things just didn't look right.
Oops, it was upside down.
Hello seam ripper.
Unfortunately, I had used the tiniest straight stitch and zigzag on my machine, so starting over took some time.
Aarrggh.
Even worse, the seam ripper skipped and made a hole right in the front.
I'll post my solution tomorrow....

Labels: , ,

Saturday, March 27, 2010

No Peeking, Jackie!

I've been intending to complete this project for quite awhile now.
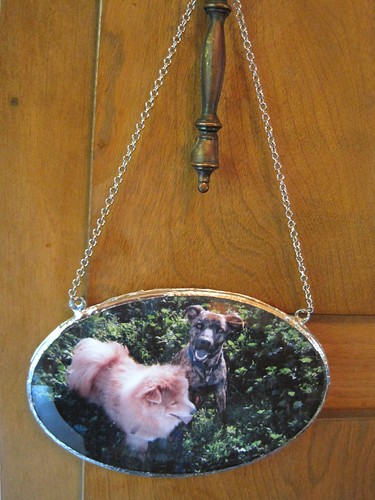
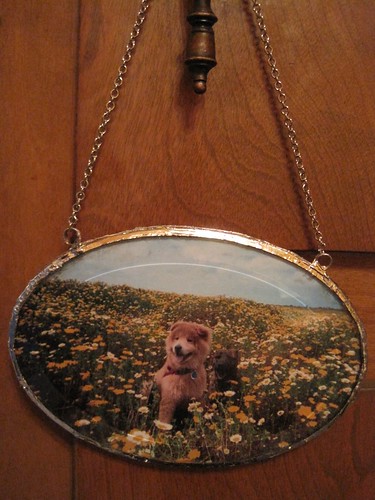
I had taken some super cute photos of doggies Dylan and Reese a year ago (surprisingly good quality from a disposable camera!).
I set the pics aside and didn't show the owners, knowing these were so special that I knew I needed to make something.
I did blog one, hoping the owners didn't see it.

At first I was thinking I'd place the photos back-to-back under glass and make a Christmas ornament.
But that would have meant reducing the size of the images, and I really wanted the full impact of a 4" x 6".

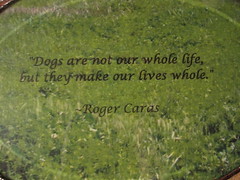
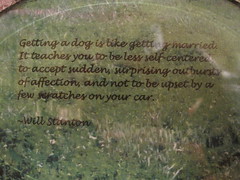
So I thought, well, I can still place them under glass, but I'll make two, with a dog-themed quotation on the reverse.
The finished product can hang on a wall or whatever.
I found some amazing beveled glass at Alpine Glass (a stained glass store in San Diego).
Soldering stuff at the ready

I envisioned these hanging by a chain, so an employee at Alpine glass showed me how to twist copper wire around a pencil to make the loops for hanging.


Christmas came and went, but I still wanted to finish this.
Jackie (their "mom") just had a birthday this week, so I pushed myself to work on the project.
Ta Da!
Soldered Ornament
Another Soldered Ornament

One of the reasons it took me so long to get around to putting these together was that I got hung up on what paper to use on the reverse--what paper should the quote be on?
Certainly not something plain...but what?
Should I collage the reverse in dog-themed images?
Nah...too busy.

And it finally dawned on me what to use for the reverse--the greenery from Fiesta Island (the same location as the other photographs).

So I took a photo I had of Leroy, and I cropped out the green.
Leroy

That way the reverse is in the same color family, and I think it works
(a bit of glare from the night shot...lights hitting the glass)
Reverse side of soldered ornament
Dog Quote on soldered ornament

But let's be real, shall we?
These are far from perfect, but the more I messed with it, the gloopier it got.
Ugh!
But then that tends to be my style, if you followed my making of the butterfly charms at all.

At one point, I peeled off the copper tape that I had already soldered, and started again.
Aarrgghhh.

Then my iron got too hot, and repeatedly going over an area left it burned (oops!)
I have one iron that doesn't get hot enough, and another that gets too hot.
I need a really decent stained glass-quality soldering iron
So I mended it.


Finally, at some point, I just had to step away and call it okay.
As Sally Jean Alexander would say, "Love and embrace"
(I will be blogging about my class with her soon, by the way).

I'm pretty sure Jackie is going to love these though.
Between those cute faces and that gorgeous glass--they'll make her smile.

Labels: , ,